Smartscope WiFi Bridge: Difference between revisions
mNo edit summary |
mNo edit summary |
||
| (7 intermediate revisions by the same user not shown) | |||
| Line 3: | Line 3: | ||
The WiFi Bridge and client GUI both implement ZeroConf, which means that you don't need to input any IP address -- they will find each other automatically. | The WiFi Bridge and client GUI both implement ZeroConf, which means that you don't need to input any IP address -- they will find each other automatically. | ||
<br>[[File:BridgeIll.png|400px]] | |||
<br> | <br> | ||
Some benefits of the SmartScope server: | Some benefits of the SmartScope server: | ||
* Allows to control a SmartScope from a (non-jailbroken) iPhone/iPad. Simply download the SmartScope app from the regular AppStore, and it will connect to a SmartScopeServer running in the network! | * Allows to control a SmartScope from a (non-jailbroken) iPhone/iPad. Simply download the SmartScope app from the regular AppStore, and it will connect to a SmartScopeServer running in the network! | ||
* | * Internal 4400mAh battery allows 9h+ of wireless connectivity to the SmartScope (full performance over WiFi) | ||
* In case this would not be enough, you can charge the WiFi Bridge while it is operating | * In case this would not be enough, you can charge the WiFi Bridge while it is operating | ||
* Last but not least, you can use the SmartScope WiFi Brige as a standard USB battery pack to charge any USB device :) | * Last but not least, you can use the SmartScope WiFi Brige as a standard 4400mAh USB battery pack to charge any USB device :) | ||
Typical use-cases: | Typical use-cases: | ||
* Cases where a wired connection is just not that practical | * Cases where a wired connection is just not that practical | ||
* Leave your SmartScope at a test setup, and you can visualize the result from your chair | * Leave your SmartScope at a test setup, and you can visualize the result from your chair | ||
* Non-jailbroken iOS devices | |||
* ... | * ... | ||
<br> | <br> | ||
| Line 24: | Line 25: | ||
# Connect any device to the SmartScope WiFi | # Connect any device to the SmartScope WiFi | ||
# Start the SmartScope app on that device! | # Start the SmartScope app on that device! | ||
==If this doesn't work== | |||
... it probably means there is no ZeroConf service installed on the client machine, which is required to auto-detect the scope on the network. This is how to solve it: | |||
* Windows: download and install Apple's Bonjour service from https://support.apple.com/kb/DL999 | |||
* Linux: pre-installed on most distributions, otherwise you need to install the avahi-deamon package | |||
* MacOS: pre-installed on MacOS | |||
* Android: pre-installed on Android | |||
* iOS: pre-installed on iOS | |||
<br> | <br> | ||
=Slightly more detailed manual= | =Slightly more detailed manual= | ||
| Line 59: | Line 67: | ||
# at the top of this menu, click the 'Reset to own AP' button | # at the top of this menu, click the 'Reset to own AP' button | ||
Remember to also point your device to the Access Point of the Wifi bridge! | Remember to also point your device to the Access Point of the Wifi bridge! | ||
=Exterior information= | =Exterior information= | ||
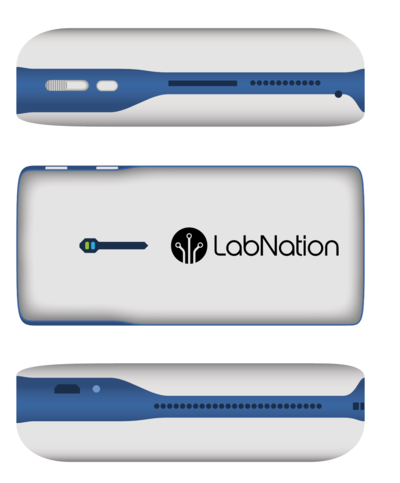
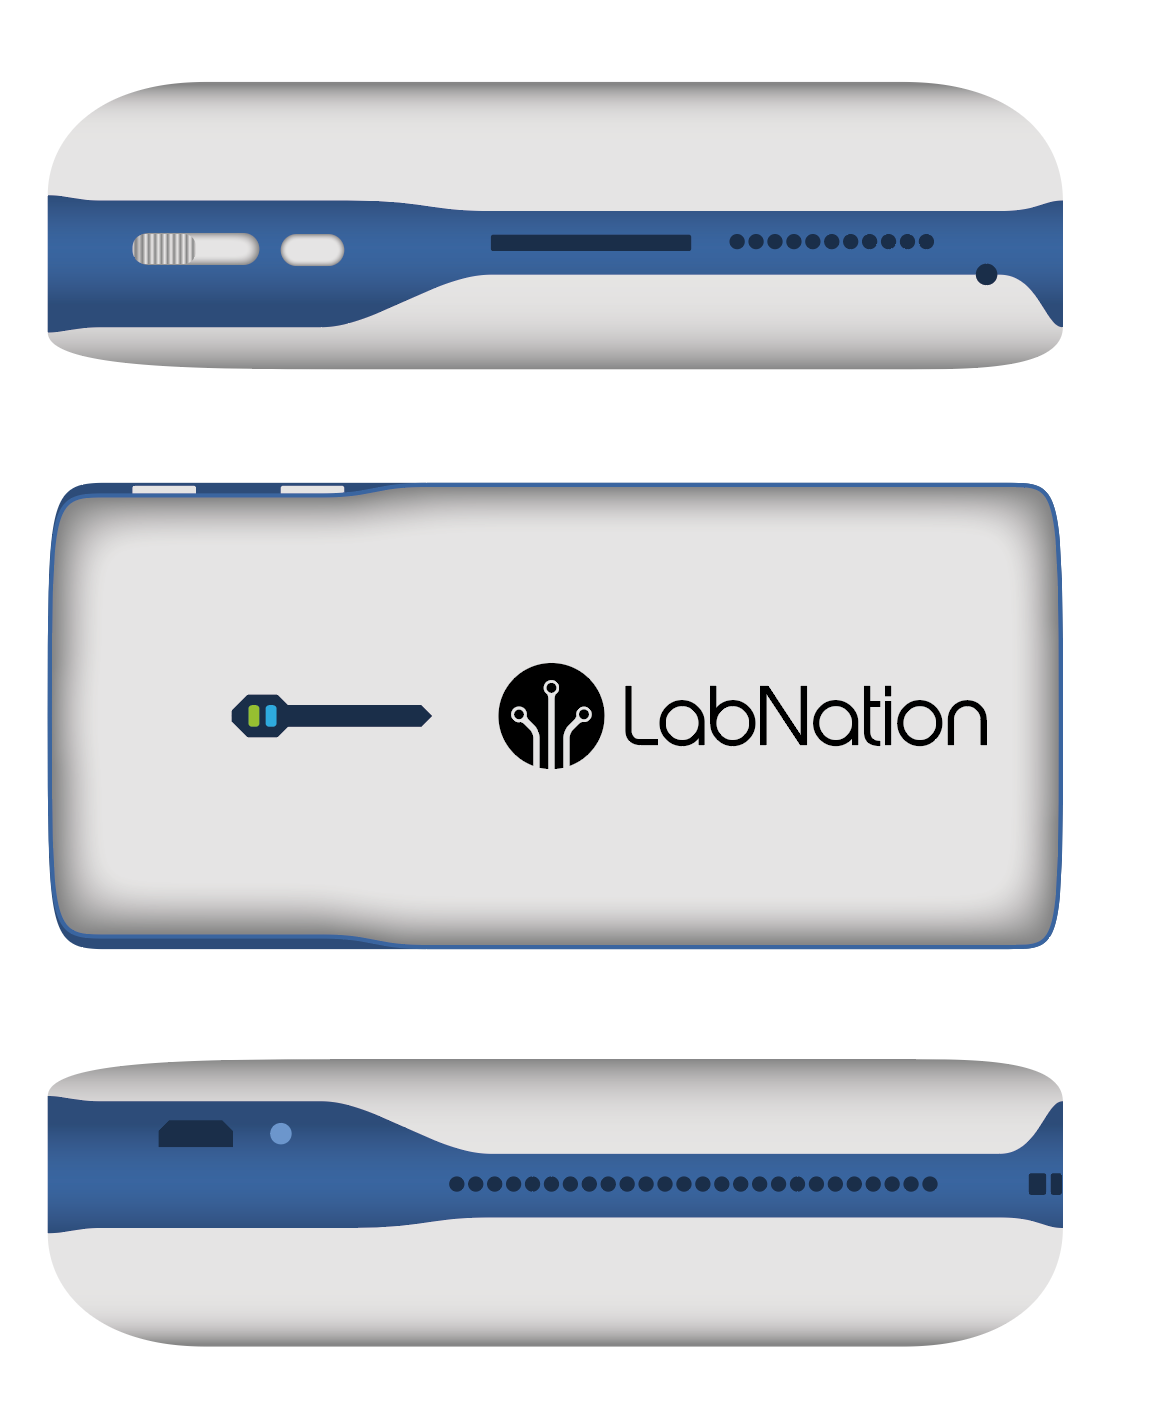
[[File:BridgeIll.png]] | [[File:BridgeIll.png]] | ||
==Ports== | ==Ports== | ||
* '''USB port: ''' this is where you connect the SmartScope | * '''USB port: ''' this is where you connect the SmartScope | ||
* '''Test button:''' pressing the 'T' button will show 0 to 4 LEDs, indicating the current charge on the internal battery | * '''Test button:''' pressing the 'T' button will show 0 to 4 LEDs, indicating the current charge on the internal battery | ||
Latest revision as of 19:42, 20 May 2019
The battery-operated SmartScope WiFi Bridge allows you to power and use your SmartScope over a wireless or wired network connection. Because the SmartScope WiFi Bridge includes a battery, all you need to do is connect your SmartScope to the WiFi bridge and you can use any tablet/phone/PC on the network to run the GUI! The WiFi Bridge and client GUI both implement ZeroConf, which means that you don't need to input any IP address -- they will find each other automatically.
Some benefits of the SmartScope server:
- Allows to control a SmartScope from a (non-jailbroken) iPhone/iPad. Simply download the SmartScope app from the regular AppStore, and it will connect to a SmartScopeServer running in the network!
- Internal 4400mAh battery allows 9h+ of wireless connectivity to the SmartScope (full performance over WiFi)
- In case this would not be enough, you can charge the WiFi Bridge while it is operating
- Last but not least, you can use the SmartScope WiFi Brige as a standard 4400mAh USB battery pack to charge any USB device :)
Typical use-cases:
- Cases where a wired connection is just not that practical
- Leave your SmartScope at a test setup, and you can visualize the result from your chair
- Non-jailbroken iOS devices
- ...
QuickStart guide
- Switch the WifiBridge to Active mode by moving the main switch to the outer right position
- Wait for the LED to stop blinking
- Hook up a SmartScope to the USB port of the WiFi Bridge
- Connect any device to the SmartScope WiFi
- Start the SmartScope app on that device!
If this doesn't work
... it probably means there is no ZeroConf service installed on the client machine, which is required to auto-detect the scope on the network. This is how to solve it:
- Windows: download and install Apple's Bonjour service from https://support.apple.com/kb/DL999
- Linux: pre-installed on most distributions, otherwise you need to install the avahi-deamon package
- MacOS: pre-installed on MacOS
- Android: pre-installed on Android
- iOS: pre-installed on iOS
Slightly more detailed manual
Overview
When the Wifi bridge is set to Active mode by switching the Main switch to its rightmost position, the Wifi bridge will cycle through the following states:
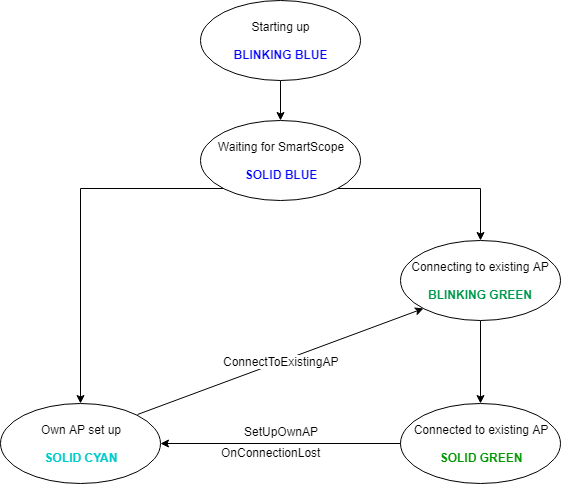
- After booting, the wifi bridge will wait for a SmartScope to be connected to its USB port.
- As soon as a SmartScope has been detected, the bridge will load the last configuration
- In case the Wifi bridge was connected to an existing Access Point, the wifi bridge will try to reconnect using the same credentials as last time
- Otherwise, the Wifi bridge will set up its own Access Point named SmartScope XXXX (where XXXX is the bridge serial number)
Whenever it is not possible to connect to an existing Access Point, or when the connection to an existing Access Point is lost for 15 seconds, the Wifi bridge resets and sets up its own Access Point
Connecting your device/pc/tablet/phone to the SmartScope on the Wifi bridge
Just make sure that both the Wifi bridge and your device are connected to the same network:
- In case of the bridge's AP, make sure your device is connected to the SmartScope XXXX AP
- In case the bridge is connected to an existing AP, make sure your device is also connected to that same AP
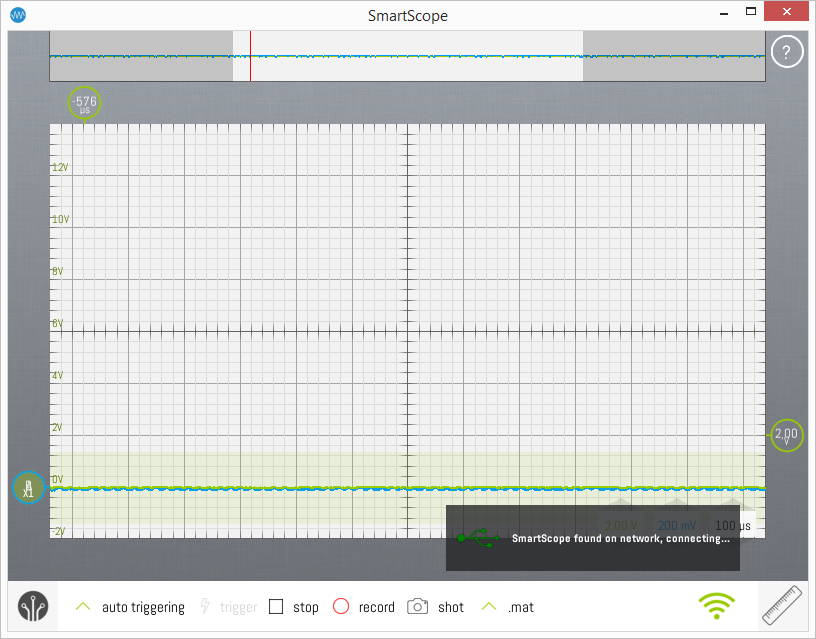
Next, simply start the SmartScope app on your device. You'll see a toast that a SmartScope has been found on the same network, after which you can control the SmartScope as if it were connected locally!
Switching from own AccessPoint to an existing AccessPoint
At first run, the bridge will have set up its own AccessPoint. However, since connecting your own device to the Bridge's AP means you no longer have internet connection on your own device, you'll typically want to hook up the Wifi bridge to an existing network (eg: company wifi or home wifi). This is very easy to do:
- start the SmartScope app an connect to the SmartScope on the Wifi bridge
- once connected, you'll notice the USB icon at the bottom-right has changed into a wifi icon
- upon clicking on this icon, a scrollable menu will open up which lists all detected existing Access Points in the neighborhood
- click on the Access Point you want the Bridge to connect to
- this opens up a form on the left side of the screen, where you can fill in the password for the company/home Access Point
- finally, click Connect after which the Wifi bridge will drop its own Access Point and connect to the existing Access Point!
- if this fails, the wifi bridge will return to its own Access Point after 15 seconds
Of course, remember to connect your own device to the same Access Point. You will find the SmartScope present on your trusted network!
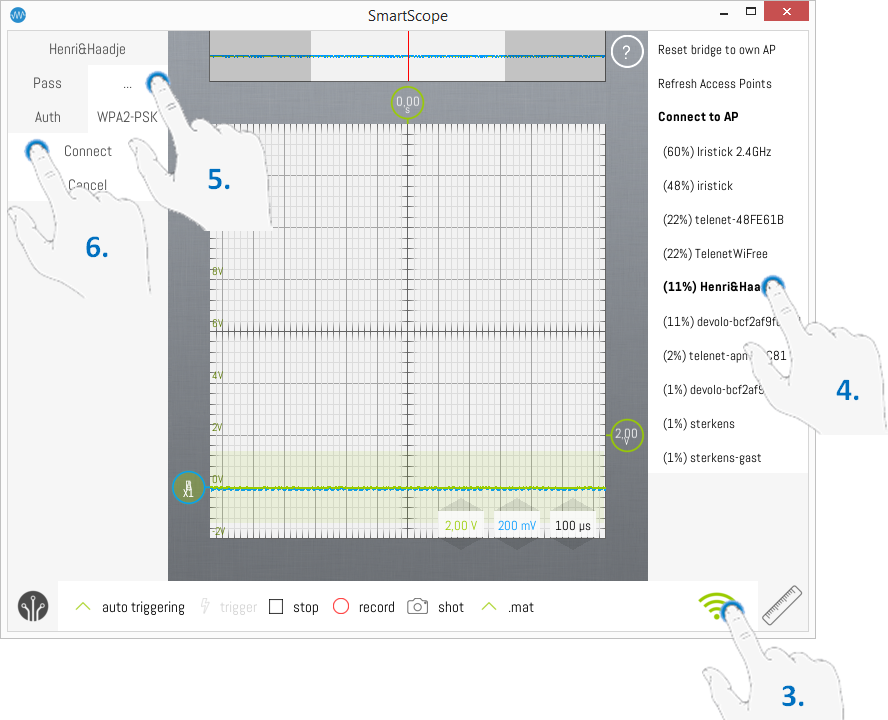
Switching from an exsiting AccessPoint back to the bridge's own AccessPoint
In order to log off from an external Access Point and ask the bridge to set up its own Access Point again, simply:
- start the SmartScope app an connect to the SmartScope on the Wifi bridge
- once connected, you'll notice the USB icon at the bottom-right has changed into a wifi icon
- upon clicking on this icon, a scrollable menu will open up
- at the top of this menu, click the 'Reset to own AP' button
Remember to also point your device to the Access Point of the Wifi bridge!
Exterior information
Ports
- USB port: this is where you connect the SmartScope
- Test button: pressing the 'T' button will show 0 to 4 LEDs, indicating the current charge on the internal battery
- Main switch:
- Left position '0': WiFi bridge is off. Use this for storing the device.
- Middle position 'C': Charger mode, see below
- Right position 'R': Active mode, see above
- Micro-USB port: used for charging the internal battery. You can use the SmartScope while charging the battery.
LED indicator
The states of the LED indicator are listed in the state diagram above. This allows you to easily find out which state the Wifi bridge is in.
Reset button
There's a reset button on the side of the device, which requires a paperclip or other thin pin to push.
| Duration | Result |
|---|---|
| < 1s | Set wifi back AP mode with default SSID |
| > 5s | Factory reset bridge and reboot |
Charger mode
While in charger mode, you can connect any chargeable USB device to charge it. WiFi/CPU are disabled to conserve energy.
