Getting started on iOS: Difference between revisions
Jump to navigation
Jump to search
mNo edit summary |
No edit summary |
||
| (3 intermediate revisions by one other user not shown) | |||
| Line 1: | Line 1: | ||
<span style="color:#CC0000">'''!!! Important note !!!'''</span><br> | |||
Since we've released the SmartScopeServer functionality which allows any (non-jailbroken) iDevice to connect to a SmartScope over wifi, we've dropped the support for a cabled iOS solution. We found ourselves always catching up with every iOS update, which was far from optimal for both us and custumer. | |||
See [[Using the smartscope on the network]] on how to access a SmartScope over wifi. | |||
=Install SmartScope on iOS with Cydia= | =Install SmartScope on iOS with Cydia= | ||
<span style="color:#CC0000">'''!!! Not | <span style="color:#CC0000">'''!!! Not working from iOS 9 onward !!!'''</span> | ||
<br><span style="color:#00CC00">'''!!! Our NetworkBridge has been released which does not require jailbreaking, see the note at the top of this page !!!'''</span> | |||
* [[Jailbreak your iDevice so it can connect to the SmartScope]] | * [[Jailbreak your iDevice so it can connect to the SmartScope]] | ||
* Open Cydia | * Open Cydia | ||
| Line 8: | Line 12: | ||
* Tap '''add''' (top left) | * Tap '''add''' (top left) | ||
[[File:cydia-step2.png|x400px]] | [[File:cydia-step2.png|x400px]] | ||
* Enter http://ios.lab-nation.com/ | * Enter http://ios.lab-nation.com/stable and tap '''add source''' | ||
[[File:cydia-step3.png|x400px]] | [[File:cydia-step3.png|x400px]] | ||
* Wait for the '''Reload Data''' to complete | * Wait for the '''Reload Data''' to complete | ||
| Line 19: | Line 23: | ||
[[File:cydia-step6.png|x400px]] | [[File:cydia-step6.png|x400px]] | ||
* To '''Update''' the app, do the same. The '''Install''' button will now say '''Modify''' where you can choose '''Upgrade''' | * To '''Update''' the app, do the same. The '''Install''' button will now say '''Modify''' where you can choose '''Upgrade''' | ||
=Connect the SmartScope to an iOS phone/tablet= | =Connect the SmartScope to an iOS phone/tablet= | ||
# Connect the central miniB port of the SmartScope using a regular miniB USB cable<br>[[File:miniB.jpg|400px]]<br><br> | # Connect the central miniB port of the SmartScope using a regular miniB USB cable<br>[[File:miniB.jpg|400px]]<br><br> | ||
Latest revision as of 22:42, 14 August 2017
!!! Important note !!!
Since we've released the SmartScopeServer functionality which allows any (non-jailbroken) iDevice to connect to a SmartScope over wifi, we've dropped the support for a cabled iOS solution. We found ourselves always catching up with every iOS update, which was far from optimal for both us and custumer.
See Using the smartscope on the network on how to access a SmartScope over wifi.
Install SmartScope on iOS with Cydia
!!! Not working from iOS 9 onward !!!
!!! Our NetworkBridge has been released which does not require jailbreaking, see the note at the top of this page !!!
- Jailbreak your iDevice so it can connect to the SmartScope
- Open Cydia
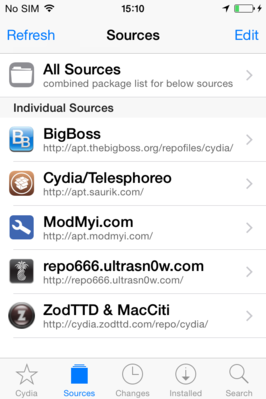
- Go to the Sources tab
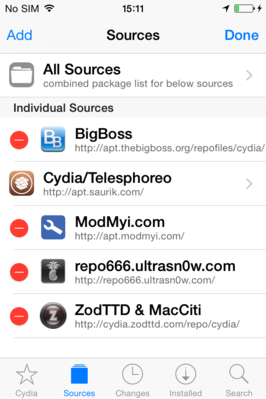
- Tap edit (top right)
- Tap add (top left)
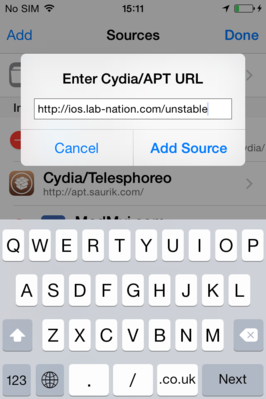
- Enter http://ios.lab-nation.com/stable and tap add source
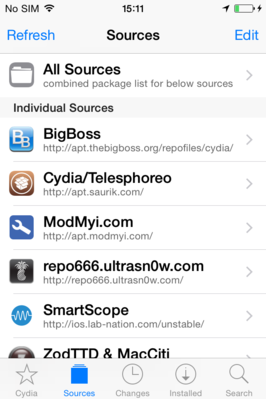
- Wait for the Reload Data to complete
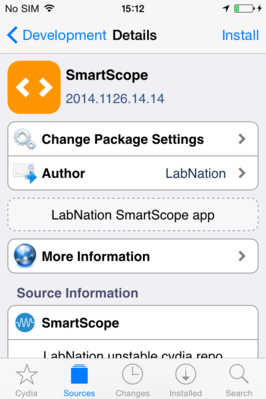
- Tap SmartScope > Development > SmartScope
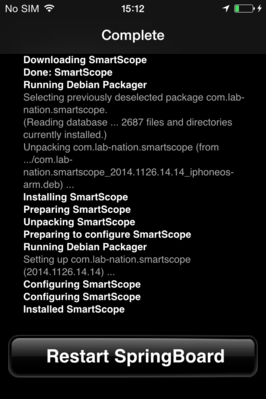
- Tap Install and follow the instructions
- When installing is complete, tap Restart SpringBoard (otherwise, you won't see the app icon)
- To Update the app, do the same. The Install button will now say Modify where you can choose Upgrade
Connect the SmartScope to an iOS phone/tablet
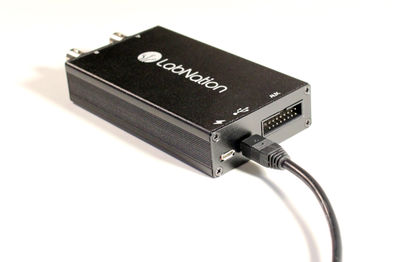
- Connect the central miniB port of the SmartScope using a regular miniB USB cable
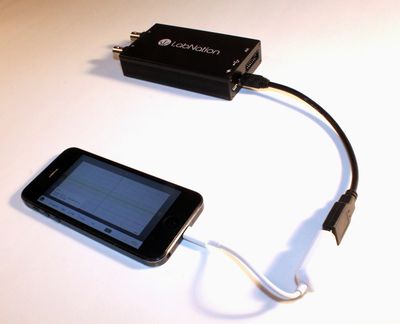
- Connect this USB cable to your iOS device using the Apple Camera Connection Kit cable
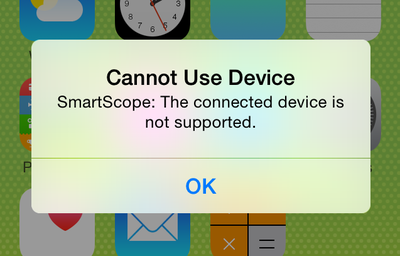
- You might get a popup stating the SmartScope is not supported.
We didn't apply for iOS certification, as this would require us to drop compatibility with all other operating systems (Android, Windows, Linux).
Tap OK to dismiss this message, as it has no further impact on operations.
- Start the SmartScope app, and go solve your problems!!
